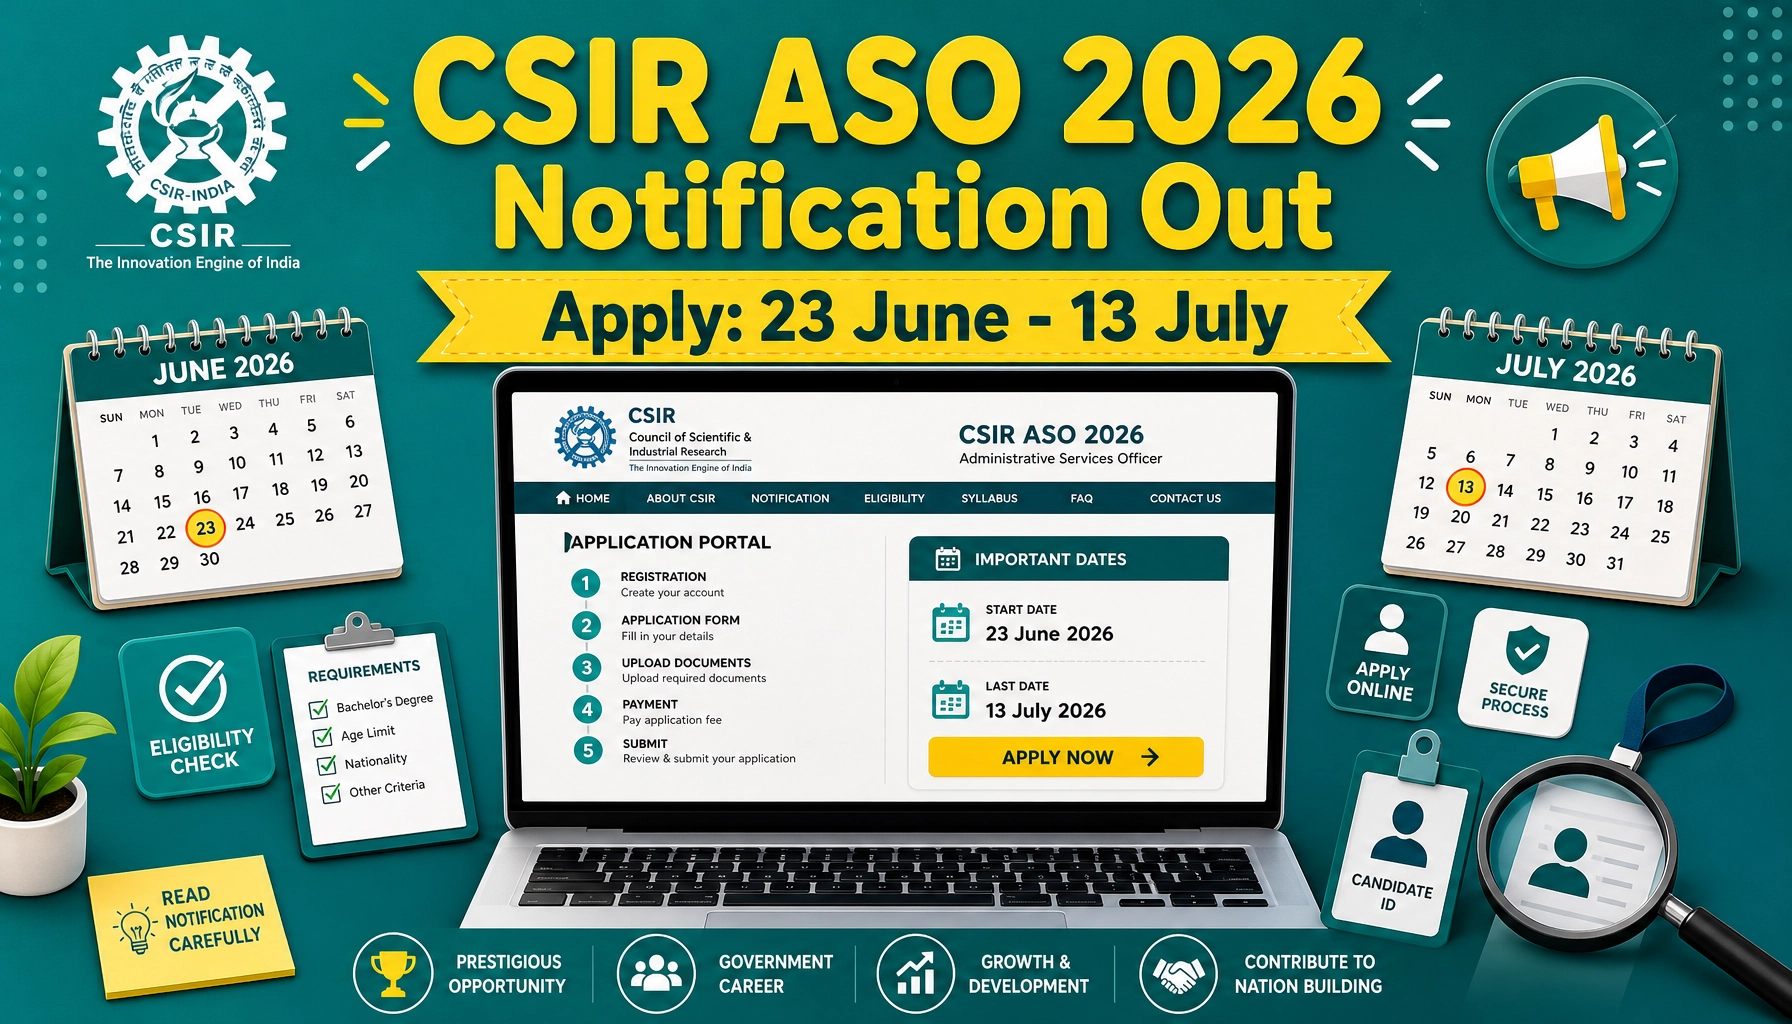
Filling an online recruitment form for the first time can feel overwhelming, but the CSIR Assistant Section Officer (ASO) 2026 application is straightforward once you break it into stages. This walkthrough takes you through everything in order — from the files you should keep ready on your desktop, to clicking the final submit button and saving a printout. Follow it slowly, and you will sail through the form for all 100 vacancies advertised under notification number E-I/RC/2026/2.Govt Jobs UP
Key Dates at a Glance
| Event | Date & Time |
|---|---|
| Registration opens | 23 June 2026 (10:00 AM) |
| Last date to register & submit | 13 July 2026 (05:00 PM) |
| Last date for online fee payment | 13 July 2026 (05:00 PM) |
Apply here: https://recruitment.csir.res.in or https://www.csir.res.in. Use Google Chrome for the best experience. No offline or postal applications are accepted.
Stage 1: Gather Your Files Before You Begin
The single biggest time-saver is preparing every scanned file before opening the form. The portal will reject files that do not match the exact size and format limits, so scan carefully and check each one.
Photograph specifications
- Format: JPG only
- Size: less than 50 KB
- Dimensions: 200 pixels high × 150 pixels wide
- A recent passport-style colour photo on a light, preferably white background
- Look straight at the camera with a relaxed face; no red-eye, no glare on glasses
- Caps, hats and dark glasses are not allowed. Religious head wear is fine as long as the face is visible.
Signature specifications
- Format: JPG only
- Size: less than 50 KB
- Dimensions: 50 pixels high × 150 pixels wide
- Sign on white paper using black ink, signed only by you
If your photo or signature refuses to upload, use the “Help me Upload & Resize” tool inside the form to crop and adjust the file.
Documents (PDF, max 1 MB each)
- Proof of date of birth
- Educational certificates from 10th onwards — combine each qualification’s passing certificate and mark sheets into a single merged PDF per qualification
- CSE-2024 mark sheets (Preliminary plus Mains + Personality Test) merged into one PDF
- Experience certificate, if you are claiming any experience
- Caste/community certificate and disability certificate, if applicable
- Any other supporting document
Keep a working email ID and mobile number — both must stay active until the entire selection process ends, as all communication arrives there.Application Guide
Stage 2: Registration Steps
- Open https://recruitment.csir.res.in within the application window.
- Click Apply Online.
- Register using your UPSC Roll Number, email address and mobile number.
- On successful registration, a User ID and password are sent to your registered email and mobile. Note them down and change the password for safety.
- Log back in any time before the closing date. If you forget your credentials, use “Forgot Password” to recover them.
Stage 3: Complete Your Profile
The first time you log in, you must fill your profile page — gender, date of birth, marital status, category, PwBD status and type of disability (if any), ex-serviceman status, and government/CSIR employee status. Review everything on the confirmation screen, because once the profile is verified and locked, it cannot be edited. Take your time here.
Stage 4: Filling the Application Form
The form is divided into clear tabs that you complete one after another:
Also read: bilingual mock test English Hindi.
- Apply
- Personal Details
- Education
- Experience
- Additional Details
- Uploads
- Preview & Submit
Enter information exactly as it appears on your certificates. Spell your name and your parents’/spouse’s names precisely. You may log in multiple times to fill different sections, but always click Save/Update on each page so nothing is lost. CSIR holds you solely responsible for any typing errors — corrections are not entertained later.sarkari naukri
Stage 5: Uploading Documents
Move to the Uploads tab and attach each scanned file in its correct slot — photograph, signature, date-of-birth proof, educational certificates, CSE-2024 mark sheets, experience certificate and any category/disability certificates. After uploading, confirm that every file is clearly visible, legible and successfully attached.
Stage 6: Paying the Application Fee
Category-wise amount
| Category | Fee |
|---|---|
| UR, OBC (NCL), EWS | Rs. 500 |
| Women / SC / ST / PwBD / Ex-Servicemen | NIL (no fee) |
If you fall in a fee-exempt category, you can print your application directly after submission. If a fee applies, follow these steps:
- Click the SBI COLLECT hyperlink to reach the SBI payment gateway.
- Tick “I have read and accepted the terms and conditions stated above” and click Proceed.
- Select your payment category and enter the details carefully.
- Fill in your Application No., name, post, email ID and mobile number correctly — you’ll need these later to check payment history.
- Confirm the details and continue.
- Choose a payment mode from the MOPS page: UPI, Debit Card, Net Banking and so on.
- After payment, download the e-Receipt from the SBI Collect site using the DU Reference No., or the DOB + mobile number combination.
Then return to the online form, enter your payment details and upload the e-Receipt before the deadline of 13 July 2026, 05:00 PM.
Stage 7: Final Submission & Printout
Open the Preview & Submit tab and read through your entire application one last time. Remember that no edits are possible after final submission. Once you are sure everything is correct, click Submit and then OK. An Application Number will be generated. Finally, take a printout (hard copy) of the completed form — you must produce it along with original documents whenever the office requires it.
also read sarkari result
Tips to Avoid Rejection
- Watch the file sizes: photo and signature must each stay under 50 KB in JPG format, with the exact pixel dimensions given above.
- Sign correctly: use black ink on white paper; the signature you upload should match the one you give at document verification, or you may be disqualified.
- Merge PDFs as instructed: mark sheets and certificates that need to be combined should be a single file, each under 1 MB.
- Don’t rush at the last minute: heavy traffic near the deadline can cause website jams — apply early.
- Verify before locking your profile: category, date of birth and disability status cannot be changed once locked.
- Use a stable email and mobile: all updates, notifications and corrigenda appear only on the CSIR website and your registered contacts.
For technical trouble, write to ra.helpdesk@csir.res.in. PwBD candidates can reach the Grievance Redressal Officer at 011-23470301. Apply carefully, double-check, and you’ll have a clean, accepted application.

About the Author
kalpana_megam
I am a content writer with 2 years of experience specializing in government job notifications and results. He curates and simplifies the latest updates on recruitment notifications, exam schedules, admit cards, answer keys, and results from various central and state government departments. With a keen eye for accuracy and timeliness, he helps job aspirants stay informed about upcoming opportunities and navigate the competitive exam landscape with ease. His writing focuses on delivering clear, reliable, and aspirant-friendly information to guide candidates at every step of their government job journey.